 Windows Informer Windows OS Tips
 Disable Windows Defender on Windows 10 OS – Here this article provides you the permanent solution to disable Windows Defender on your Windows 10 PC. Windows Defender is a free Antivirus software which Microsoft includes for all Windows Operating System. You can use Windows Defender as the security software on your Windows PC or Laptop as it protects from Virus, Malware, Rootkits, Spyware, and from all other Malicious files on your Windows PC.
Windows Defender runs automatically on your device when you open and then it will run in the background and scan all your PC to check for the Malicious software. If it finds any dangerous files then you will get a notification to remove it immediately. But many users started using other Antivirus Defender Software Applications on their PC and then they try to disable the Windows Defender tool on Windows 10 OS. But it couldn’t be possible to disable permanently on Windows 10 because Microsoft planned to protect completely.
But, you can disable the service in some scenarios as it is a temporary option to use. So you can disable Windows Defender on your Windows 10 OS by using the two methods as you can use any of them on Windows PC/laptop.
How to Disable Windows Defender on your Windows 10 PC/Laptop
Method 1# By using the Local Group Policy
You can use Local Group Policy if you are using Enterprise Edition of Windows 10 Operating System.
- Open the Run Tab and then enter gpedit.msc which means Group Policy Editor and Click OK.
- Now in Group Policy service, navigate to Computer Configuration and then Administrative Templated and then Windows Component > Windows Defender.
- Now as you visit Windows Defender. Double Click on the Turn Off Windows Defender which is in the right box.
- Now it will disable the Windows Defender and then click on Apply and OK.
So by this way, you can disable the Windows Defender on the Local Group Policy editor. If you wish to disable by using other methods then you can choose method 2.
Method 2# By using the Registry to disable Windows Defender
You can use Registry if you use any of the Windows 10 Operating System. Open the Run Tab and then enter regedit and click OK to open Registry.
- Under Regedit, you need to follow the path HKEY_LOCAL_MACHINE\SOFTWARE\Policies\Microsoft\Windows Defender.
- Now check for the DWORD DisableAntiSpyware. If you do not see then right click on the empty space and then select New and then click on DWORD a32-bit value.
- You need to name the key as DisableAntiSpyware and then double click on the key which you have created and then set the value from 0 to 1.
- Restart your Windows 10 PC and then you can see that Windows Defender is Turned Off.
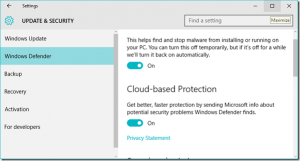
You can also use the Settings tab on Windows 10 to disable the Windows Defender. Go to settings tab and then Update & Security. Under Update & Security, you can see Windows Defender option to Turn On or Turn Off the Windows Defender. Turn off the Toggle to the left side and then click on save changes on your Windows 10.